Written by Mike Johnson in Design
Hi folks, Mike here again with a quick tutorial per a customer request.
Hey! Spring is here!……..even if the weather isn’t exactly cooperating. One of the questions I get asked most often when it comes to plumbing gas are these fancy new gas grills with the quick disconnect hoses from Weber grill company. It seems like there’s a lot of confusion as to what and how these grills actually get hooked to your home. Before we get in to talking about how that works let’s first discuss gas grills in general so you are aware of the advantages and disadvantages of both propane and natural gas.
The 2 types of gas grills – Advantages and Disadvantages of both
You have a choice of two different styles of gas grills. The most common gas grill sold in the last 40 years are the type where you purchase a steel tank full of pressurized Propane and simply screw it to the short hose hanging from the burner assembly under the grill. It’s a pretty simple solution.
The second type of grill uses Natural Gas. Natural Gas and Propane are not the same thing, they are completely different and the two are not compatible. On a natural gas grill you can NOT buy a tank at the grocery store or the local hardware store for your grill. A natural gas grill MUST be hooked up to your home gas system, the question of course is HOW we do it right? Let’s talk abut that.
Natural Gas Grill –
The Advantages of a natural gas grill are many. First off, imagine using your home stove if you had to hook up a heavy bottle of Propane. It’s ridiculous right? Well, with a natural gas grill it’s hooked to your home system so the only way you would run out of gas is if you forget to pay the gas company. You have two options when hooking up a gas grill.
- Stub out. This is a bit crude but it does work. This is a system where a plumber simply drills a hole in your house and sticks out a piece of steel pipe and screws a valve to it. It’s then up to the home owner to find a way of taking the grill assembly and connecting to it.
- Gas Plug Safety quick disconnect. The second style, which is the by far the safest, is more of a SYSTEM than anything else. You see, the grill companies all got together and agreed to share a system of quick-disconnect fittings that attach to your grill using a 10 foot reinforced safety hose. This allows the home owner freedom to safely move the grill around the deck or patio. It also allows the home owner the ability to disconnect the grill from the house in a matter of seconds. The beauty of this SYSTEM gets even better. The hose that Weber supplies with the grill mates up with a box that a plumber installs on the house itself. The most important part of the system is the safety box or as it’s known in the plumbing world…..GAS PLUG.
GAS PLUG. So the grill has this hose and unlike the the first method of attachment we don’t just hook it to a pipe. The box that gets installed on the side of your home has a couple of unique features. The first feature is safety, the box has a build in valve that doesn’t allow the user to disconnect the grill until the gas valve (located in the box) is turned off. Pretty neat hey?
The second feature of the box or “gas plug” is that it has a quick disconnect fitting that is designed to mate up with the Weber grill. And if the quick disconnect fitting isn’t already cool now imagine this – It’s a full swivel disconnect! That means there’s no strain put on the safety hose when you move the grill around! lastly, everything that’s put inside this “box” is certified and complies with all local and state plumbing codes. Did I mention the box has a cover? Yeah, the box opens and closes so it remains weather proof 365 days a year.
Hooking up a gas grill to your home gas system just makes sense. Gas is cheaper Propane, I think that’s obvious, but that’s not really what it’s about. While it’s great to save money it’s even better to not deal with the darn Propane tanks. I was talking to a customer today and we both shared a laugh, it really sucks when you are grilling out a steak the propane runs out. I mean, nothing is worse than having that happen while grilling. The convenience alone is worth it.
The last real advantage is weight. Propane tanks are heavy. They are heavy to carry. They are heavy to deal with, just getting them back and fourth and hooking them up is a giant hassle. There’s also the hassle of moving a grill with a tank. Ever move a grill when there’s no tank sitting underneath? It’s light and it’s much easier to move.
Disadvantages
Let’s not forget about the
Disadvantages of a natural gas grill however! My job isn’t to sell you plumbing, it’s to educate and inform. It’s not all rainbows and lollipops.

The biggest disadvantage of hooking up a gas grill to your home gas system is cost. Like most things in life it costs money for convenience. It’s not super expensive but let’s face it, you gotta still go in he basement and find a place in the gas system where we can feed the grill with enough volume and pressure, a medium size grill is in the neighborhood of 50,000 BTU’s so we need to account for that in the design. We also have to consider the price of the safety box, the box itself costs over $150 as of this writing (4-15-13).
So how expensive is it? It’s hard to say because 99% of the cost is based on the location of the grill and the location of the nearest gas port available in your home but I can say with confidence that most of the systems I put in cost under $700 total and that includes a box.
NOTE: It’s important to understand that the internal components of a Gas vs Propane grill are different! Very different!
Step-By-Step guide to hooking up a gas grill to your home
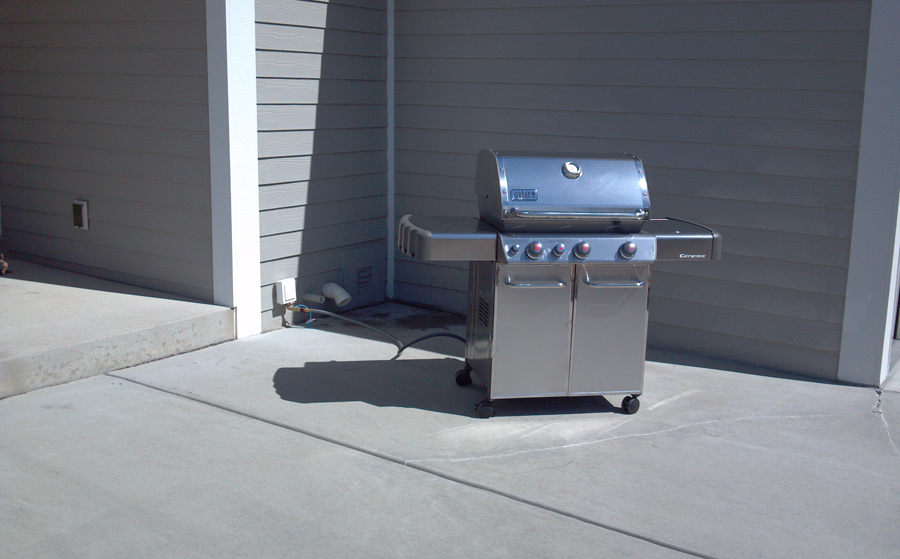
First photo shows the GOAL, it shows the final product talked about in this tutorial.
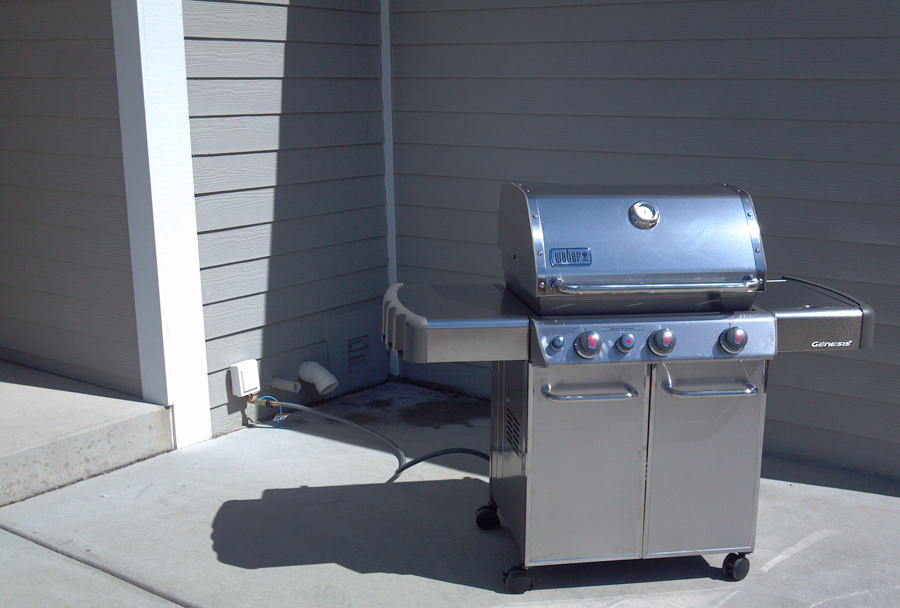
Weber Genesis S-330 Grill in Stainless.
Ok, Let’s talk about the photo above. Richard, the customer who owns this grill had me plumb gas to the white box you see on the side of the house. This box, or “Gas Plug” is the safety box I talked about earlier. It might be hard to see from the photo but look closely at where the grey colored hose is attached to the box. See how it has an elbow? That is something extra I install at no charge. What that does is turn the quick disconnect sideways so it’s easier to swivel the grill around. The part is made from brass.
Anyhow, Richard was very happy. Don, the store manager at Steins Garden Center, worked with Richard and I so we could get him exactly what he wanted from a gas grill. The installation went flawless and allows Richard the freedom to move his grill under the roof from rain or out in the sunshine. It also allows him some peace of mind when it comes to safety. Did I mention he’ll never run out of gas? HA! Geez, that’s such a nice thing to have when grilling.
So let’s get started!!!!!
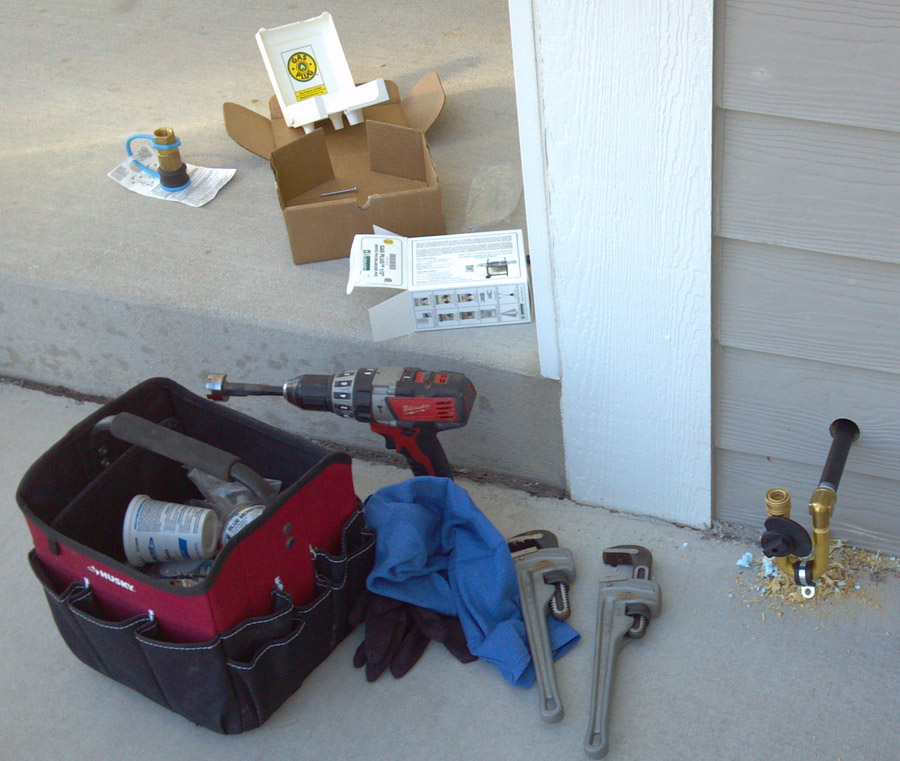
Hooking up the Gas Plug Safety Device to the gas pipe.
Well, let’s take a look at the photo and see what we got here. The tools are pretty basic, just a couple of pipe wrenches, some hand tools, a drill and a 1-3/8″ drill bit. (The 1-3/8″ drill bit matches a special seal that fits that size. The seal is what seals the home from the weather). As you can see above the gas is poked out of the home pretty far. It’s actually just a loose piece of 18″ pipe right now because it get hooked to the gas system AFTER the Gas Box is installed. The brass device threaded to the pipe is the heart of the system. If you look closely at the brass shaped “U” (which is currently upside down for install purposes) you will see a kidney shaped plastic disc right? Well, that’s a safety cam that locks the quick disconnect Gas hose from the grill. In truth, it’s the handle for the valve itself. When it’s in an open condition and gas is flowing you can NOT disconnect the gas hose.
I’ll crop a photo quick and see if I can get a better shot at the valve.
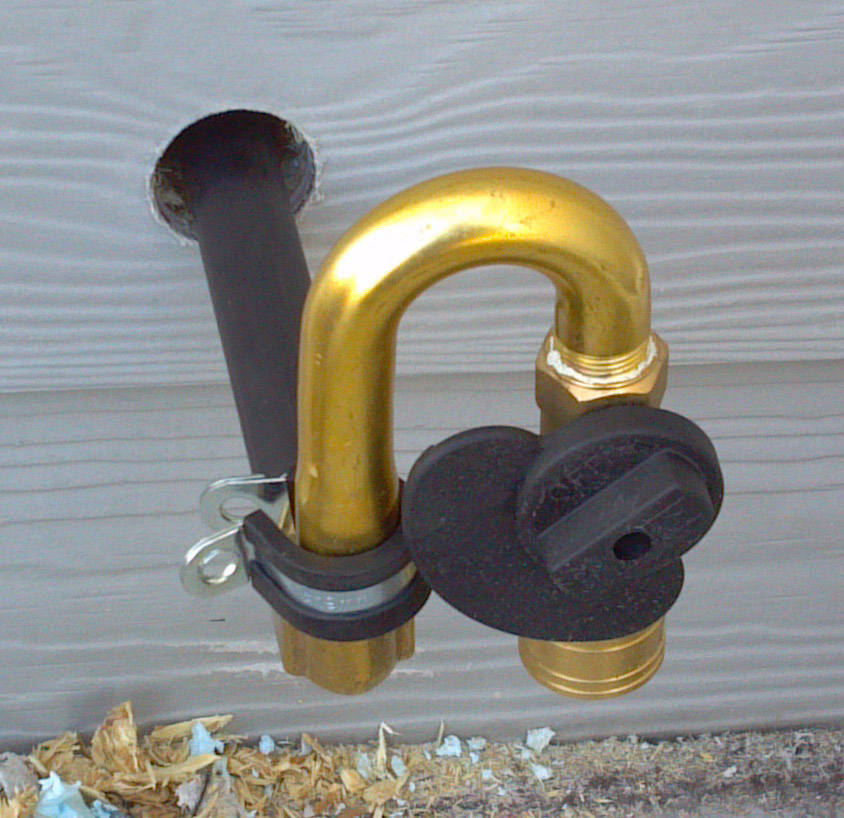
Here is the gas safety device close up. It's also turned the way it sits against the house.
I wish I had a better photo but what you can’t see here is how the valve handle, shaped like a Kidney, locks the quick disconnect shut. It’s not until the gas valve is shut off that the quick disconnect is free to open. The plastic decorative box goes on latter.
Here is what it looks like when it installed and the plastic lid is opened up for service. Pretty sweet set-up!
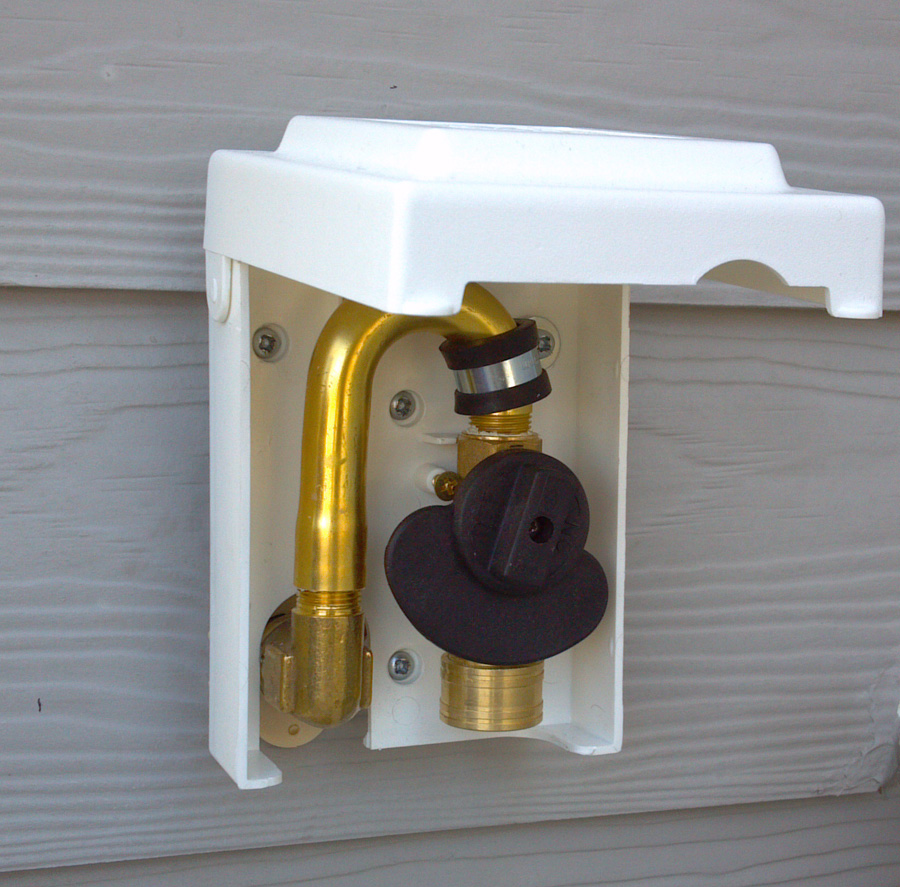
Final installation of the Gas Plus with the lid opened up for service
Alright, I managed to find a better photo to show you what I’m talking about. You see how that cam is resting on top of the brass collar on the disconnect? That locks it down! In order to disconnect the flexible gas hose supplied by Weber the valve MUST be turned off, this allows the collar to slide up vertically and unlock the hose. Also, remember that 1-3/8″ hole I drilled???? See the plastic insert that fills the hole now? It’s designed specifically to capture the steel pipe and seal against the house.
BONUS FEATURE: I bet you are wondering what happens if the gas hose to the gas grill is disconnected and the valve is turned on right? It still doesn’t flow gas! It has a bonus feature with the quick disconnect, if the hose is not connect gas will NOT flow even if the valve is open!!!!!!
Here is what it looks like with the lid shut
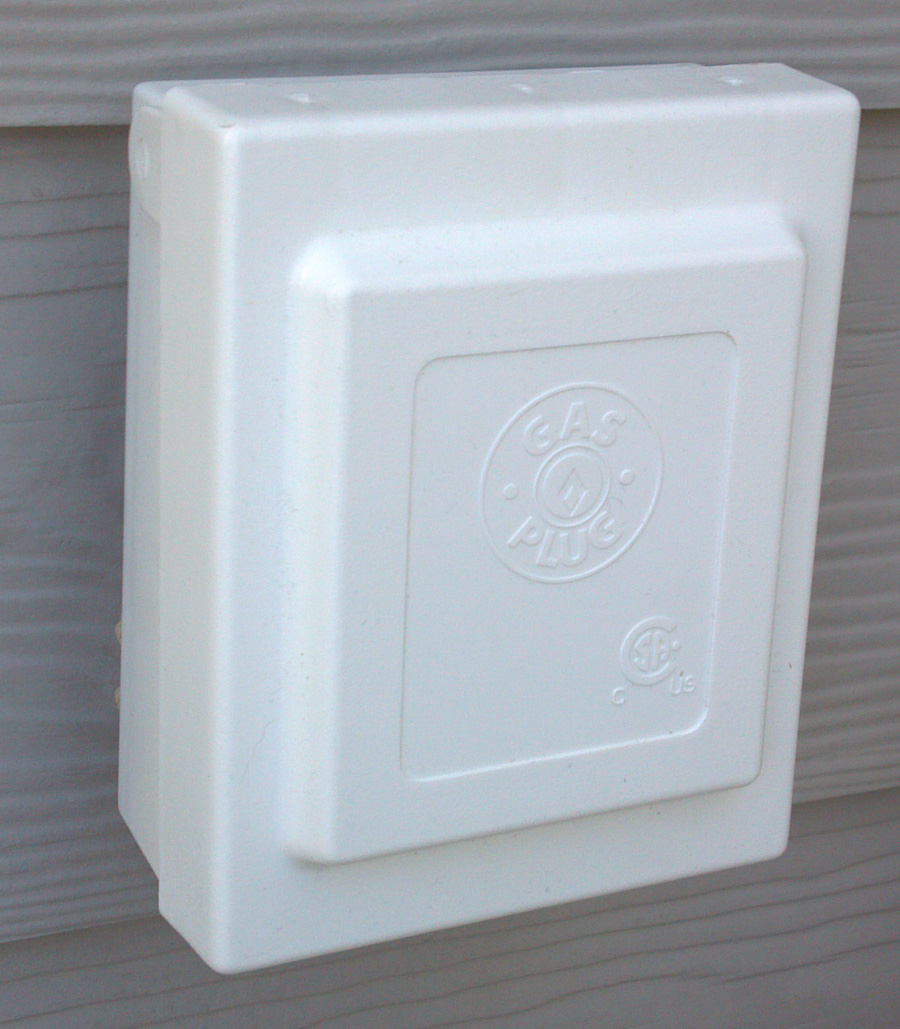
Gas Plug box with the lid closed
See the above photo? You thought I was kidding when I called it a “Gas Plug” hey? Strange name I know, not much I can do about that. We’ll blame it on the Canadians. It’s made by a company called Burnaby Manufacturing.
We still have to hook this up to your gas system, now it’s time to move inside the house.
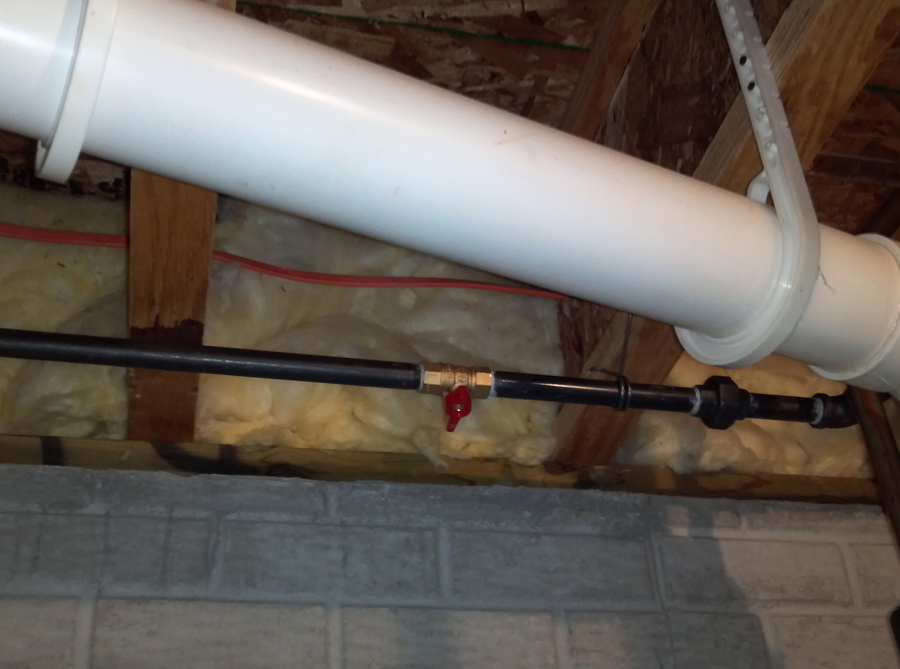
Hooking up the gas inside the house
All I have are two photos showing the gas on the inside of the home. I was fortunate because the current gas system had a perfectly sized “T” available to pull gas from. On the right side of the photo you can see an elbow and a union. The supply is hidden in the photo but that’s where the elbow is connected. The “union” you see in the photo is used for two reasons. The first reason is because it allows me to run the pipe backwards so I can thread it all together and the second reason reason is so we can service the Gas Plug box if we have to.
You can also see where I installed a secondary valve. There’s really no reason for it but It makes me feel good so I thrown one on just because.
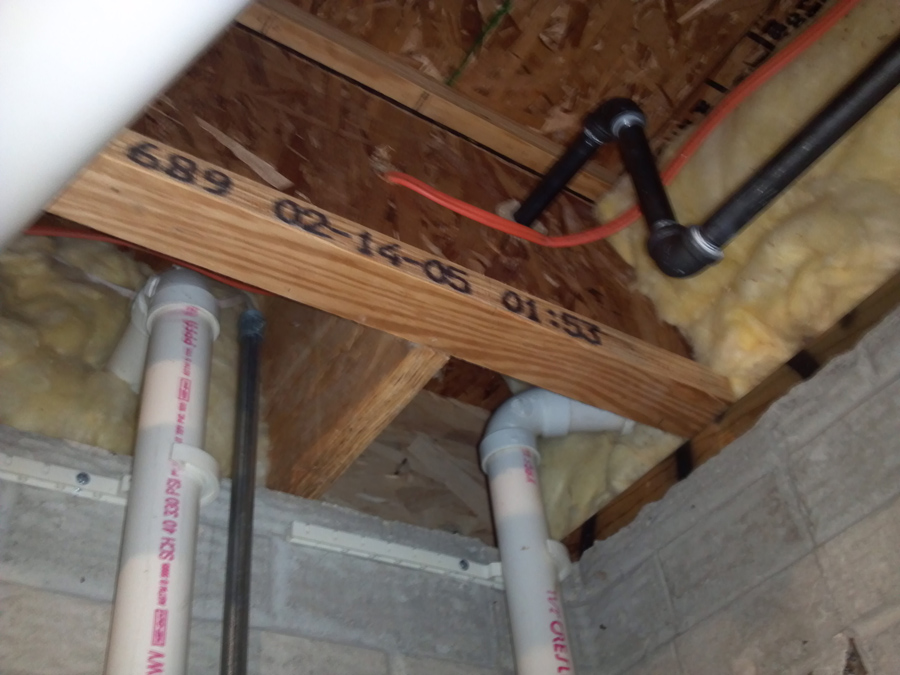
Other end of gas going out of the house to the gas box.
Unfortunately the photo isn’t real clear. But this shows the left side of the gas pip which turns up and heads straight into the Gas Box that is screwed to the side of the home. This particular gas installation was rather easy and straight forward. I was lucky the gas was so close to where the gas grill goes.
That’s it! That’s all it takes to hook up a Weber Gas grill to your home gas system using a safety Gas Box…..or GAS PLUG. It’s really neat and makes grilling fun and hassle free.
Below are the steps that should be taken when considering a Natural Gas grill that’s plumbed to your home.
- Stop by a Weber Dealer and figure out which grill suits you best. Be sure to write down the BTU requirement of the grill, this is basically the amount of natural gas required to supply the demand of the unit.
- Call me on my cell phone @ 920-988-0014 and I’ll swing over and take a look at your gas system in your basement. We want to find out how easy it will be and the approximate cost.
- If you are happy with the numbers and the math checks out fine you can order the grill.
- Call me so we can coordinate the delivery with the retail store. We want to time it so upon delivery the gas is hooked up and it can be tested live on site at the time of installation.
Conclusion:
I was personally impressed with the Don Malek, the store manager at Stein Gardens & Gifts. Not only are they one of the largest sellers of Weber grills in the area but Don goes out of his way to help you and I coordinate the entire process. Don understands what’s involved and he will work with you to get the right grill. I realize many businesses don’t like to give referrals but quite frankly it doesn’t bother me a bit. I proudly endorse Don and the crew over at Stein Garden Center. They are all top notch and Don is a stand up guy. The last customer we had was a tough cookie to please and between Don and I and the Carl the delivery guy Richard was ecstatically happy.
Mike

Weber Brochure


